
How to Prepare for Your First 14er
This post may contain affiliate links, which means I’ll receive a commission if you purchase through my links, at no extra cost to you. Please read full disclosure for more information.
Are you wondering how to prepare for your first 14er? You’re in the right place.
Hiking a 14er—a mountain over 14,000 feet high—is pretty much a rite of passage for anyone living in Colorado. 14ers offer an exciting challenge, an escape into nature, and (from the summit) unparalleled views of the Rocky Mountains.
Many tourists who visit the state would love to get in on the fun but don’t know where to start. Colorado is home to a whopping 58 14ers, and they vary widely in difficulty level and risk factor. Some peaks are accessible to newbie hikers; others are extremely dangerous and should only be attempted by experts.
In this article, we’ll cover everything you need to know on how to prepare for your first 14er: which peak to choose, how to train, when to go, what to pack, and how to stay safe on the mountain.
How to Choose Your First 14er
The first step in preparing for your first 14er is choosing the right peak—and 14ers.com is a great resource. This website offers a comprehensive summary of each 14er, including length, difficulty, risk factors, and routes (in case you weren’t overwhelmed already, each mountain has multiple trails to the top).
It’s also a forum where mountain climbers post information on current route conditions, hike times, and other tips.
14ers by Difficulty

A great place to start is the website’s ranking of 14er peaks by difficulty. For your first 14er, choose a Class 1 or easy Class 2. What’s the difference?
Here’s a quick overview of 14er classes:
- Class 1 requires hiking only.
- Class 2 requires some scrambling, meaning you’ll have to put your hands on the ground while climbing over rocks.
- Class 3 involves more exposed scrambling, where a fall could be serious or fatal.
- Class 4 includes short, steep areas that require a small amount of vertical climbing, but not enough to need ropes. Because ropes aren’t used, some people consider Class 4 more dangerous than Class 5.
- Class 5 is a route that requires technical climbing, complete with ropes and harnesses.
As you can see, 14er classes are more about risk than difficulty. Class 1 and 2 14ers are accessible to most people in good physical condition, regardless of hiking or mountain climbing experience. Before graduating to Class 3 and beyond, you should have several easier 14ers under your belt.
14ers by Length

When choosing your first 14er, take into consideration not just difficulty, but also length. You’ll want a route that you can easily complete in a day, with plenty of wiggle room—since it’s your first time, you don’t know how fast you’ll be able to hike or how often you’ll need to take breaks.
Plus, the longer the route, the more supplies you’ll need and the more weight you’ll be carrying.
For example, Pikes Peak’s East Slopes route is only Class 1, but it’s 24 miles long—something that would take an experienced hiker at least two days. Instead, choose a route under 10 miles for your first 14er.
Here are a few ideal options:
- Mount Elbert via Northeast Ridge route (Class 1, 9.5 miles)
- Mount Sherman via Southwest Ridge route (easy Class 2, 5.25 miles)
- Mount Bierstadt via West Slopes route (Class 2, 7.25 miles)
How to Train for Your First 14er

To prepare for your first 14er, you need to prepare for one of the toughest workouts of your life. 14ers are steep, long, and at high enough altitude to take even seasoned athletes’ breaths away—literally.
You’ll want to make sure your strength, stability, and cardiovascular endurance are up for the challenge.
Exercise…a Lot
If you’re new to hiking, I recommend training for your 14er by working out several days a week over at least a month. Make sure you do a variety of workouts, like full-body strength training, high-intensity intervals, and steady-state cardio.
Biking is especially good, since it builds your cardio endurance as well as the lower-body muscles you’ll need to climb a mountain.
Hiking isn’t the same as walking your dog down the sidewalk, and hiking a 14er isn’t the same as a typical hike. You’ll need to get used to walking up steep slopes over uneven terrain.
If you have access to lighter hiking trails, use them to train for your 14er. Get a comfortable, well-fitted backpack and start walking up steep hills (or stairs will work in a pinch) with 10-20 pounds on your back.
Adjust to the Altitude First

Even if you exercise regularly, going to the gym at sea level isn’t the same as climbing to 14,000 feet in the air. If you’re visiting Colorado, make sure to give your body a few days to adjust to the altitude before embarking up your first 14er.
You may still get altitude sickness (I do too, and I’ve lived in Colorado for a decade), but it will be much less severe.
When to Go
When preparing for your first 14er, you’ll also need to plan when to go and what time of day to start your hike. Here are a few factors to take into consideration.
14er Season

Most people consider summer “14er season,” and for good reason. 14ers are so high the trail is often covered by snow well into spring. People can and do hike 14ers in snow, but it requires much more specialized knowledge and gear.
For your first 14er, I’d recommend going between May and August to ensure the weather and trail conditions cooperate.
Start Early

No matter what month you go, you’ll need to start your hike early in the morning. This isn’t so much about the heat (though it helps with that, too) as about safety. To make sure you understand 14er safety, I first need to give you a quick botany lesson.
The last few hours of any 14er hike take place above something called the tree line: the altitude above which trees can’t grow. In summer, the Rocky Mountains are prone to afternoon thunderstorms—and if lightning strikes, the tree line can mean the difference between life and death.
Once you climb above the tree line, you become the tallest thing on the mountain. You don’t want to be stuck at the summit, with hours of hiking back to the cover of the trees, when a storm rolls in.
Trust me. The last 14er I climbed, Mt. Princeton, actually has a plaque above the tree line to memorialize a hiker who was killed by lightning there.
To minimize this risk, plan to get to the trailhead with enough time to hike to the summit and get back down to tree line by about noon. Always start earlier than you think you’ll need to give yourself extra time for breaks.
For example, if you think the route will take you four hours, give yourself six. Aim to leave from the trailhead by 8 a.m. to make sure you’ll be back to the tree line by noon.
14er Location

Another thing to consider is how far away the 14er is. Some peaks are just a couple hours from big cities like Denver, Boulder, or Colorado Springs. Some don’t look that far away on the map, but the drive takes much longer because it’s on bumpy, winding back roads.
A longer drive can pay off in better scenery and thinner crowds on the trail, but remember that you’ll need to start hiking your 14er early to beat the afternoon thunderstorms.
If you want to do the entire thing in a day, choose a 14er with a shorter drive. Or, to get the full 14er experience, you can drive in the night before and camp near the trailhead.
What to Pack for a 14er

Once you’ve chosen your 14er, planned your trip, and gotten your body in peak physical condition (see what I did there), it’s time to prepare for the actual hike.
Here’s the tried-and-true packing list that’s gotten me through over 10 14ers.
- A comfortable, roomy backpack, preferably with a water bladder
- At least three liters of water (it’s easier to store and carry in a bladder than in multiple bottles)
- Comfortable, broken-in hiking boots
- Extra socks in case yours get wet (or, if you forget gloves, you can wear them on your hands in a pinch)
- Moisture-wicking layers. Because 14ers are so tall, their weather can range from brutally hot at the base to cold and windy at the summit.
- A wind- and rain-proof jacket
- Warm hat and gloves. It gets chilly at the summit!
- Trekking poles (optional)—these can be helpful for the steep descent, especially if you have knee problems
- High-energy snacks like fruit, nuts, jerky, or sandwiches
- Sunglasses and lots of sunscreen
- Chapstick
- Fully charged headlamp, since you may be starting your hike before sunrise
- Emergency supplies: first-aid kit, whistle, firestarter, multitool, bivy
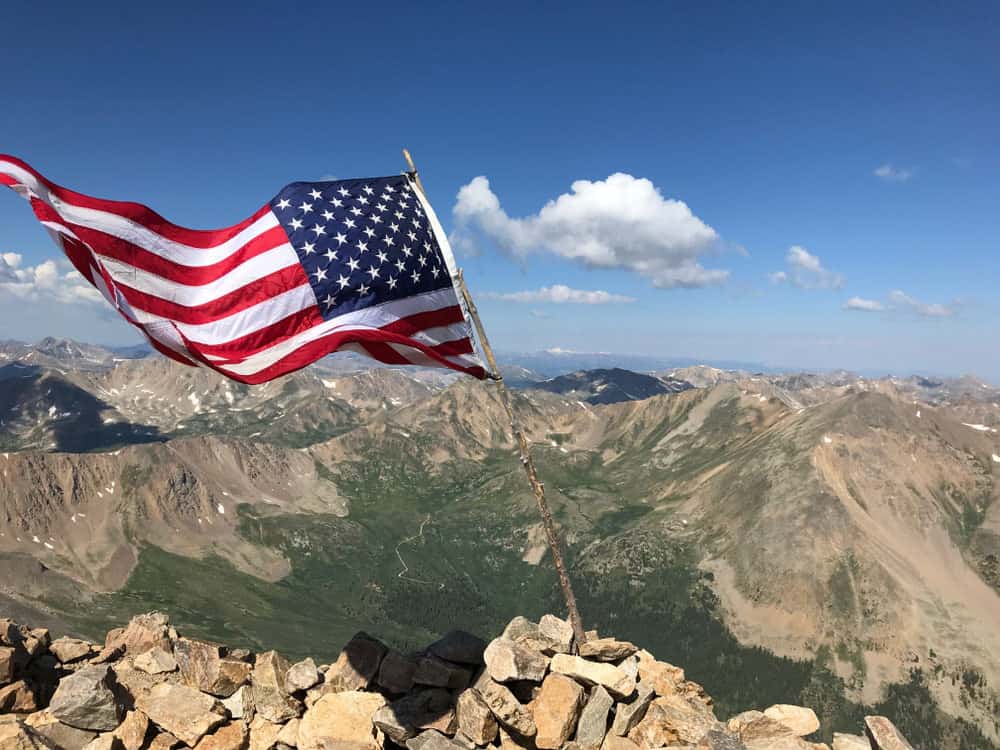
- Camera or phone to take pics. Bonus points if you bring a cardboard sign with the name and height of the mountain, as the locals do!
How to Survive Your First 14er

Being prepared for your first 14er also means understanding 14er safety. We’ve already covered lightning strikes, but there are other inherent risks, like dehydration, altitude sickness, falls, and rockslides.
I don’t say this to frighten anyone away. Class 1 and 2 14ers are safe and accessible for most people, including hiking newbies. But it’s important to understand the risks so you can be ready for them.
Here are some tips to ensure you have a safe, comfortable journey up your first fourteener:
- Hydrate and refuel often.
- Maintain a slow, steady pace to minimize your risk of altitude sickness. This allows you to take deeper breaths, providing more air to your lungs and more time for your red blood cells to carry oxygen throughout your body.
- Know the signs of altitude sickness. If it hits, give yourself time to rest. If your symptoms keep getting worse, stop and turn around. It’s a long drive to the nearest hospital, and no hike is worth dying for.
- Watch the weather. If you see dark, ominous clouds rolling in, it’s time to turn back and get below tree line.
- Stay on the trail. If you wander off, you could get lost or find yourself in any area with dangerously loose rock.
- Respect the mountain. Mother Nature does some amazing things—that’s why people like to climb mountains and explore wild areas. But remember that nature can be dangerous if you don’t treat it with respect.
- Leave no trace. Anything you bring onto the mountain, such as protein bar wrappers and plastic bags, should leave the mountain with you. Let’s keep Colorado’s natural beauty as beautiful as possible.
I’ve conquered 10+ 14ers, and I believe it’s an experience everyone who visits Colorado should have. But I’ve seen way too many idiotic tourists starting up a mountain late in the day with no sunscreen and not nearly enough water.
Some of them even wear (to my horror) flip-flops. Not only are these people the laughingstock of the mountain, but they’re also the most likely to end up needing to be rescued by helicopter.
But now that you’ve learned the basics of hiking 14ers, you can avoid being one of those people. You know everything you need to prepare for your first 14er and bag your first peak.
Visit colorado
Woohoo, you’re heading to Colorado! As Colorado locals, we have tons of posts for this state. Explore more below!
- Rocky Mountain National Park in Summer: Things to do, What to Pack, & More
- How to Spend One Day in Rocky Mountain National Park
- 13 Easy Hikes in Rocky Mountain National Park
- 10 Adventurous Rocky Mountain Tours from Denver in 2023
- Camping in Rocky Mountain National Park: Tips, Campgrounds, & More!
- How to Hike the Emerald Lake Trail in Rocky Mountain National Park